RFID Instructions View
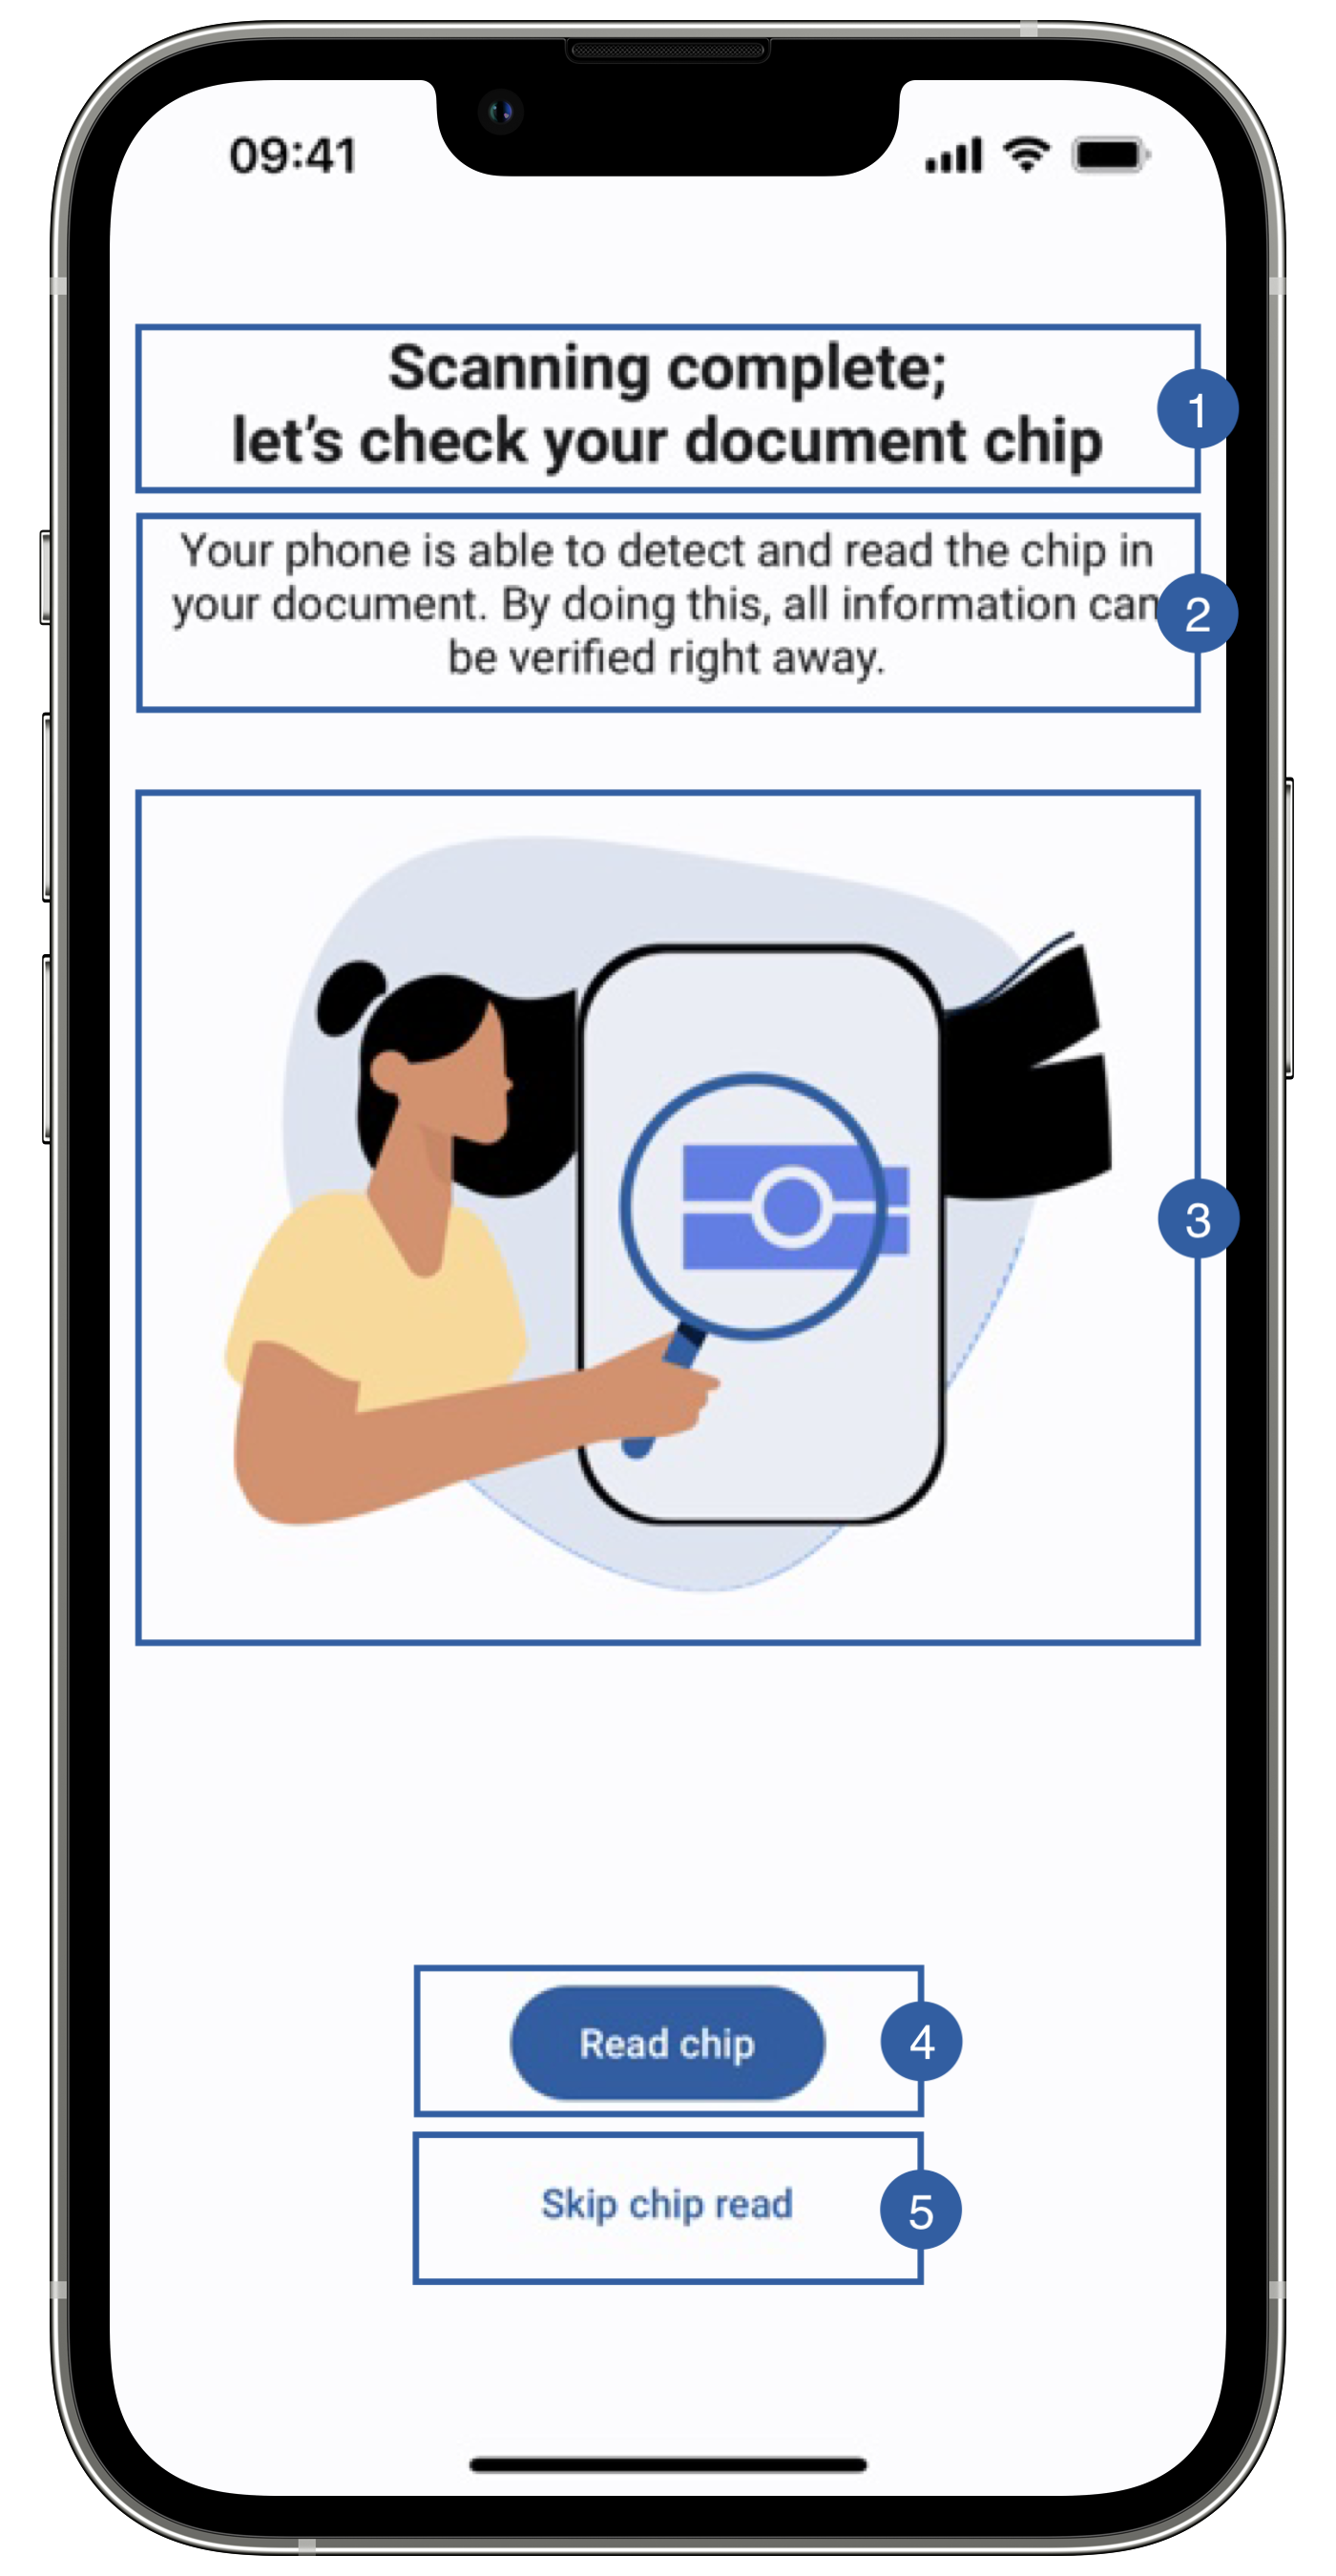
The third view of the document reader flow is the RFID Read View, this screen only appears if it is an e-Document and the variable readRFID from ReadDocumentParameters is active. This screen allows the user to prepare for the chip reading or skip this feature.

It contains a title(1), a message(2), an image(3), a read button(4), a skip button(5) and a background that can be customized.
Branding
You can apply your own branding to our screens by overriding the resources we use.
Text resources
You can add your own texts and localization by overriding the following string resources:
<string name="rfid_instructions_read_title_sdk_enrolment">Scanning complete;\nlet\'s scan your document chip.</string>
<string name="rfid_instructions_read_subtitle_sdk_enrolment">Your phone is able to detect and read the chip in your document. By doing this, all information can be verified right away.</string>
<string name="rfid_instructions_read_sdk_enrolment">Read chip</string>
<string name="rfid_instructions_skip_read_sdk_enrolment">Skip chip read</string>
The best way to override strings is by adding your key through the Theme class
Theme.shared.strings.rfid.rfidReadTitle
Theme.shared.strings.rfid.rfidReadSubtitle
Theme.shared.strings.buttons.readChip
Theme.shared.strings.buttons.skipChipRead
Colors
You can change the text colors by overriding the following color resource (It affects all texts):
<color name="colorFaceCaptureTxtDarkSdkEnrolment">#1A1C1E</color>
You can change the background color by overriding the following color resource:
<color name="colorDocumentReadRFIDBgSdkEnrolment">#EAEEF6</color>
You can change the text colors by overriding the following color in Theme class:
Theme.shared.colors.rfidData.title
Theme.shared.colors.rfidData.subtitle
You can change the background color by overriding the following color in Theme class:
Theme.shared.colors.rfidData.background
You can change the color of the read button (this affects all primary style buttons)
Theme.shared.colors.button.primaryBackground
Theme.shared.colors.button.primaryTitle
You can change the color of the skip button (this affects all secondary style buttons)
Theme.shared.colors.button.secondaryBackground
Theme.shared.colors.button.secondaryTitle
Styles
You can extend the styles we use and override any properties (textColor, textSize, fontFamily, etc...) you want.
<style name="Theme.Sdk.Enrolment.TextView.Dark.Title.Centered">
<style name="Theme.Sdk.Enrolment.TextView.Dark.Subtitle.Centered">
You can change the font through the theme class (this will affect all text in the app):
Theme.shared.fonts.bold
Theme.shared.fonts.regular
Image
You can change the image by adding a drawable with this name:
ic_read_chip_instructions.xml
You can change the image by adding a asset file and overriding the following image name in Theme class
Theme.shared.images.documentReader.rfiDescription
Use your own layouts
To use your own custom screens for document reader feature, you need to implement the MobileID SDK Interface for that view.
In this case: ICustomDocumentReader.RfidInstructionsView
interface RfidInstructionsView{
    fun getReadChipButton(): View?
    fun getSkipButton(): View?
    fun hideInstructions()
}
- getReadChipButton method must return a Button to start the rfid reading, when clicked it will also start the timeout.
- getSkipButton can return either null or a button/image to skip the rfid reading.
- hideInstructions is called when the view is dismissed.
For example create a class RfidTutorialCustomView, create a layout file and bind it.
class RfidTutorialCustomView(
context: Context
) : ConstraintLayout(context), ICustomDocumentReader.RfidInstructionsView {
private var binding: ViewRfidTutorialBinding // Requires view binding enabled
// private var view: View

    init {
        binding = ViewRfidTutorialBinding.inflate(LayoutInflater.from(context), this)
        // You can also use other inflate method like this:
        // view = inflate(context, R.layout.view_rfid_tutorial, this)
    }
    override fun getReadChipButton() = binding.btnReadChip
    // override fun getReadChipButton(): View = view.findViewById(R.id.btn_read_chip)

    override fun getSkipButton() = binding.btnSkip

    override fun hideInstructions() {
        // Do nothing
    }
}
You need to register a class of type DocumentReaderRFIDInstructionsViewType through the following function of EnrolmentViewRegister
public func registerDocumentReaderRFIDInstructionsView(_ viewType: DocumentReaderRFIDInstructionsViewType)
The DocumentReaderRFIDInstructionsViewType class needs to respect the following protocols:
public protocol DocumentReaderRFIDInstructionsViewInterface {
    var delegate: DocumentReaderRFIDInstructionsViewDelegate? { get set }
    func hideInstructions()
}

public protocol DocumentReaderRFIDInstructionsViewDelegate: AnyObject {
    func didPressReadChipButton()
    func didPressSkipButton()
}

public typealias DocumentReaderRFIDInstructionsViewType = DocumentReaderRFIDInstructionsView.Type
public typealias DocumentReaderRFIDInstructionsView = UIView & DocumentReaderRFIDInstructionsViewInterface
Example:
class RFIDReadView: DocumentReaderRFIDInstructionsView {

    weak var delegate: DocumentReaderRFIDInstructionsViewDelegate?

// MARK: - Initialization

    override init(frame: CGRect) {
        super.init(frame: frame)
        //add any UI customization you need
    }

// MARK: - Actions

    @objc private func readChipButtonTapped(button: UIButton) {
        delegate?.didPressReadChipButton()
    }

    @objc private func skipButtonTapped(button: UIButton) {
        delegate?. didPressSkipButton()
    }

// MARK: - Functions

    func hideInstructions() {
        //You can stop animations or other activities that consumes resources
    }
}